Latte Art Rosetta - Step-by-Step Guide
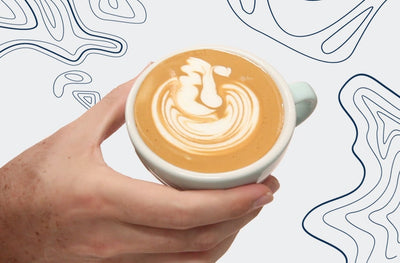
Welcome to our simple and practical guide on how to pour a latte art rosetta.
The difficulty level of pouring rosetta coffee art in your cup is intermediate.
If you haven’t already checked out and practiced the more basic latte art heart and latte art tulip pours, you might want to complete those tutorials first.
What’s more, the rosetta requires perfectly stretched milk and for this, we have created another practical guide that explains the fundamentals of how to texture your milk for latte art in detail. You kind of want to make sure you have that all wrapped up before you get to this point.
But if you’re ready, let’s dive right into learning how to make a latte art rosetta.
Latte Art Rosetta Video Guide
If you prefer visual learning, check out the latte art rosetta video - or if you'd prefer to read about the best latte art rosetta tips... scroll on :)
Video Links:
20% Coffee Discount Code: 'latteart'
Whether you’ve completed a barista course or you’re an at home coffee aficionado, the rosetta is not only fun to pour in your cup, but it also leaves a smile on the fortunate people whom you’re serving it to.
So without further ado, let’s jump right into it our rosetta latte art tutorial.
How to Pour Latte Art Rosetta?
I think as a new barista, I was always wanted to know how to make rosetta latte art. To see that leaf pattern on my coffee cup amazed me. I used to think it was drawn on with a stencil! When I first saw one poured, seeing the movement of the jug and how it made the ripples in the cup, I needed to know how to pour latte art!
Going with the Flow
The secret to a good latte art rosetta is getting the flow happening in the cup, so that when you start wiggling the jug from side to side, it helps to move the lines around in the cup. In order to get this flow going, holding your cup on a bit of an angle is helpful.
1. Set your Canvas (Crema)

We are going to start by setting the crema, as we have done with all of our patterns. because the rosetta has finer leaves, having a good solid crema base is important to stop your pattern from washing out.
2. Create the Flow

Once your crema is set, we are going to move the jug in, and give a little push like we did with our tulip bulb, in order to start creating the flow. If your cup is angled correctly, you'll see the white appear and then start flowing in the cup.
3. Wiggle & Complete the Base

Now the wiggle is what makes the rosetta happen. Gently rock the jug side to side and you’ll see the lines start to follow the flow of the cup and wrap around. We want to see some lines wrap around the spout of the jug. Once this has happened, push slightly into the pattern as you continue the wiggle to complete the base.
4. Work up the Cup

Now the next part of the pattern is tricky to perfect. You want to keep rocking evenly from side to side, as you work your way back up the cup.
5. Complete the Rosetta

Once you’ve got to the edge, lift up your jug and pull through, to cut the pattern and create the leaves of your rosetta.
Rosetta Latte Art Tips
Something to note with the rosetta - you can change the style of your lines with how fast you wiggle. The faster you wiggle the thinner your lines or leaves.. the slower you wiggle, the fatter your leaves. Some people purposely slow down their wiggle to create a ‘slowsetta’.
The biggest thing to practice with this one is to make sure that your wiggling side to side is nice and even. If you have a jug with a thinner spout it might make things a little bit easier, but you can use a fatter style spout as well. If you want you can practice with water in your jug and cup to try and get your wiggling nice and even.
Milk Texture, Milk Type & Temperature
There are several things that can spoil your rosetta, but the one thing that trips up new baristas most, is getting the texture of the milk right.
Since the milk texture is one of those things that can make or break your rosetta, it’s very important to practice, practice, practice…(before diving into latte art).
Due to it’s higher fat content, full cream milk works best to achieve that perfect silky milk. While you can use skim milk too, it’s much harder to get it to the right consistency and you could easily end up with too much foam when steaming the milk.
Soy, Almond and Oat milk can work as well, but you need to find the right milk brand that works well for latte art.
Another key factor for latte art, is the temperature. 65°C or just below that is a good guideline on how hot your milk should be. If your milk is heated up too much, it’s likely going to separate which makes it unfavourable for latte art.
➜ Learn more on how to texture milk for latte art
Ingredients & Equipment
As well as high quality milk, some other things will help you to make latte art easier.
Quality Coffee – When people are just starting out, they like to buy cheaper beans so they don't 'waste' good coffee when practising. Unfortunately, beans from the supermarket and the like are often stale, which makes it harder to pour latte art. Sometimes this can mean someone thinks they aren't getting any better at pouring, but really it's the stale coffee letting them down.
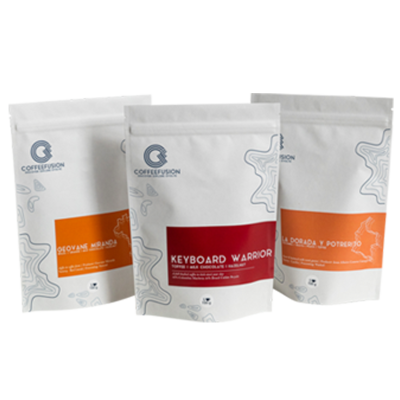
Do yourself a favour and use the discount code 'latteart' and get yourself 20% off your next delivery. Keyboard Warrior is great for latte art, and the coffee I use for all of my tutorials!
Best Milk Jug – A jug with an aligned spout is super important for latte art – but especially for the rosetta. If you're wiggling side to side but your spout isn't aligned with your handle, you won't get a symmetrical pattern. This is the problem with the cheaper milk jugs – you sometimes get a good one, but others can be unaligned. If your spout doesn't look aligned, might be time to invest in a good milk jug like the barista hustle milk jugs I sell. Aside from these – the Jibbi Jugs are also great with their purpose built spouts. However, because they're made in smaller quantities, they are very expensive.
Coffee Machine – A coffee machine suitable for latte art can be a big investment. The cheaper 'cappuccino maker' machines tend to make milk with mountains of froth, which will make latte art very hard. If you'd like some advice on your next coffee machine purchase, feel free to reach out with your budget and I can help you with your decision.
Keep Frothin'!
We hope you enjoyed this rosetta latte art tutorial.
We always love to help people make better coffee, or in this case, more beautiful coffee. We also love to share a good learning story, so if you managed to pour some nice rosettas after this tutorial, send your pics over to us and we might feature it on our Instagram account @thecoffeefusion which has almost 10K followers.
Until then… keep frothin’!


Leave a comment
Please note, comments must be approved before they are published